Summary
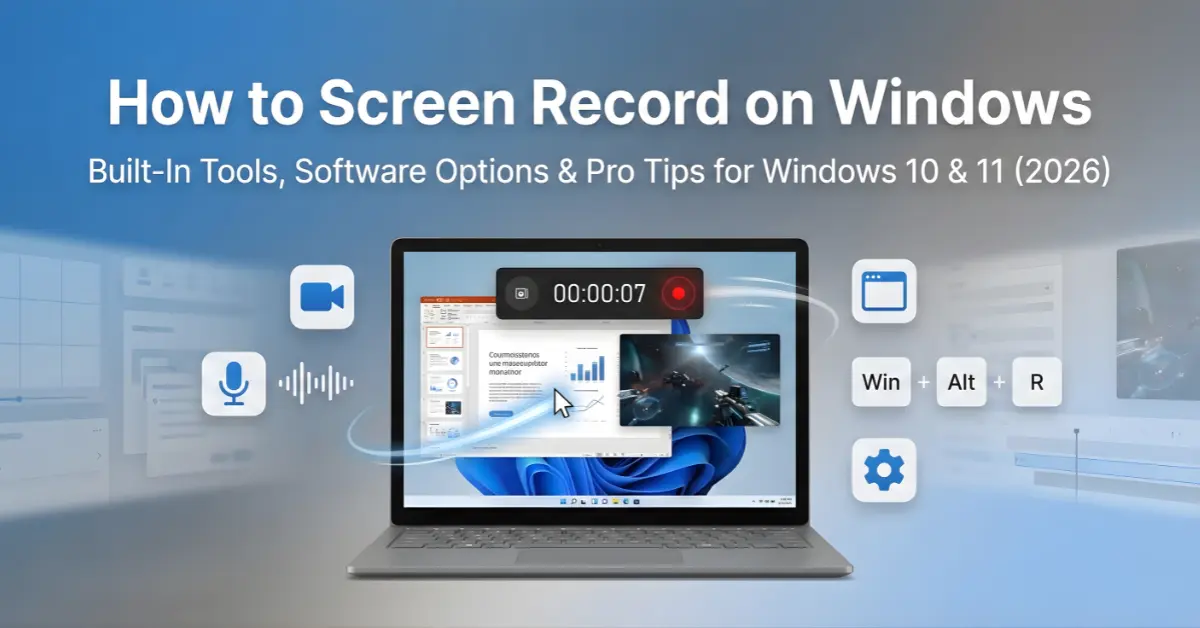
Screen recording on Windows is easier than most users expect. Windows 11 includes built-in tools like Xbox Game Bar (Windows + Alt + R) and the Snipping Tool (Windows + Shift + S) that let users record tutorials, meetings, workflows, or gameplay in seconds. In 2026, the best choice depends on recording goals, quality needs, and how much control the user wants.
Why Screen Recording Matters More Than Ever in 2026
The shift toward hybrid work, online education, and digital content creation has made screen recording an essential skill. What once seemed like a niche technical ability now ranks among the most requested features in modern operating systems.
Remote teams rely on recorded demonstrations to explain complex processes without scheduling endless video calls. Students capture lectures for review. Gamers share their best moments. IT professionals create troubleshooting guides that save hours of back-and-forth communication.
Yet despite this widespread need, confusion persists about which tools deliver the best results. This guide covers:
- Built-in Windows recording options and their hidden capabilities
- Step-by-step instructions for different recording scenarios
- How to choose between native tools and professional software
- Quality optimization techniques for crystal-clear recordings
- Common mistakes that compromise recording quality
Understanding Your Built-In Options
Recording Capabilities of Windows 10 vs Windows 11
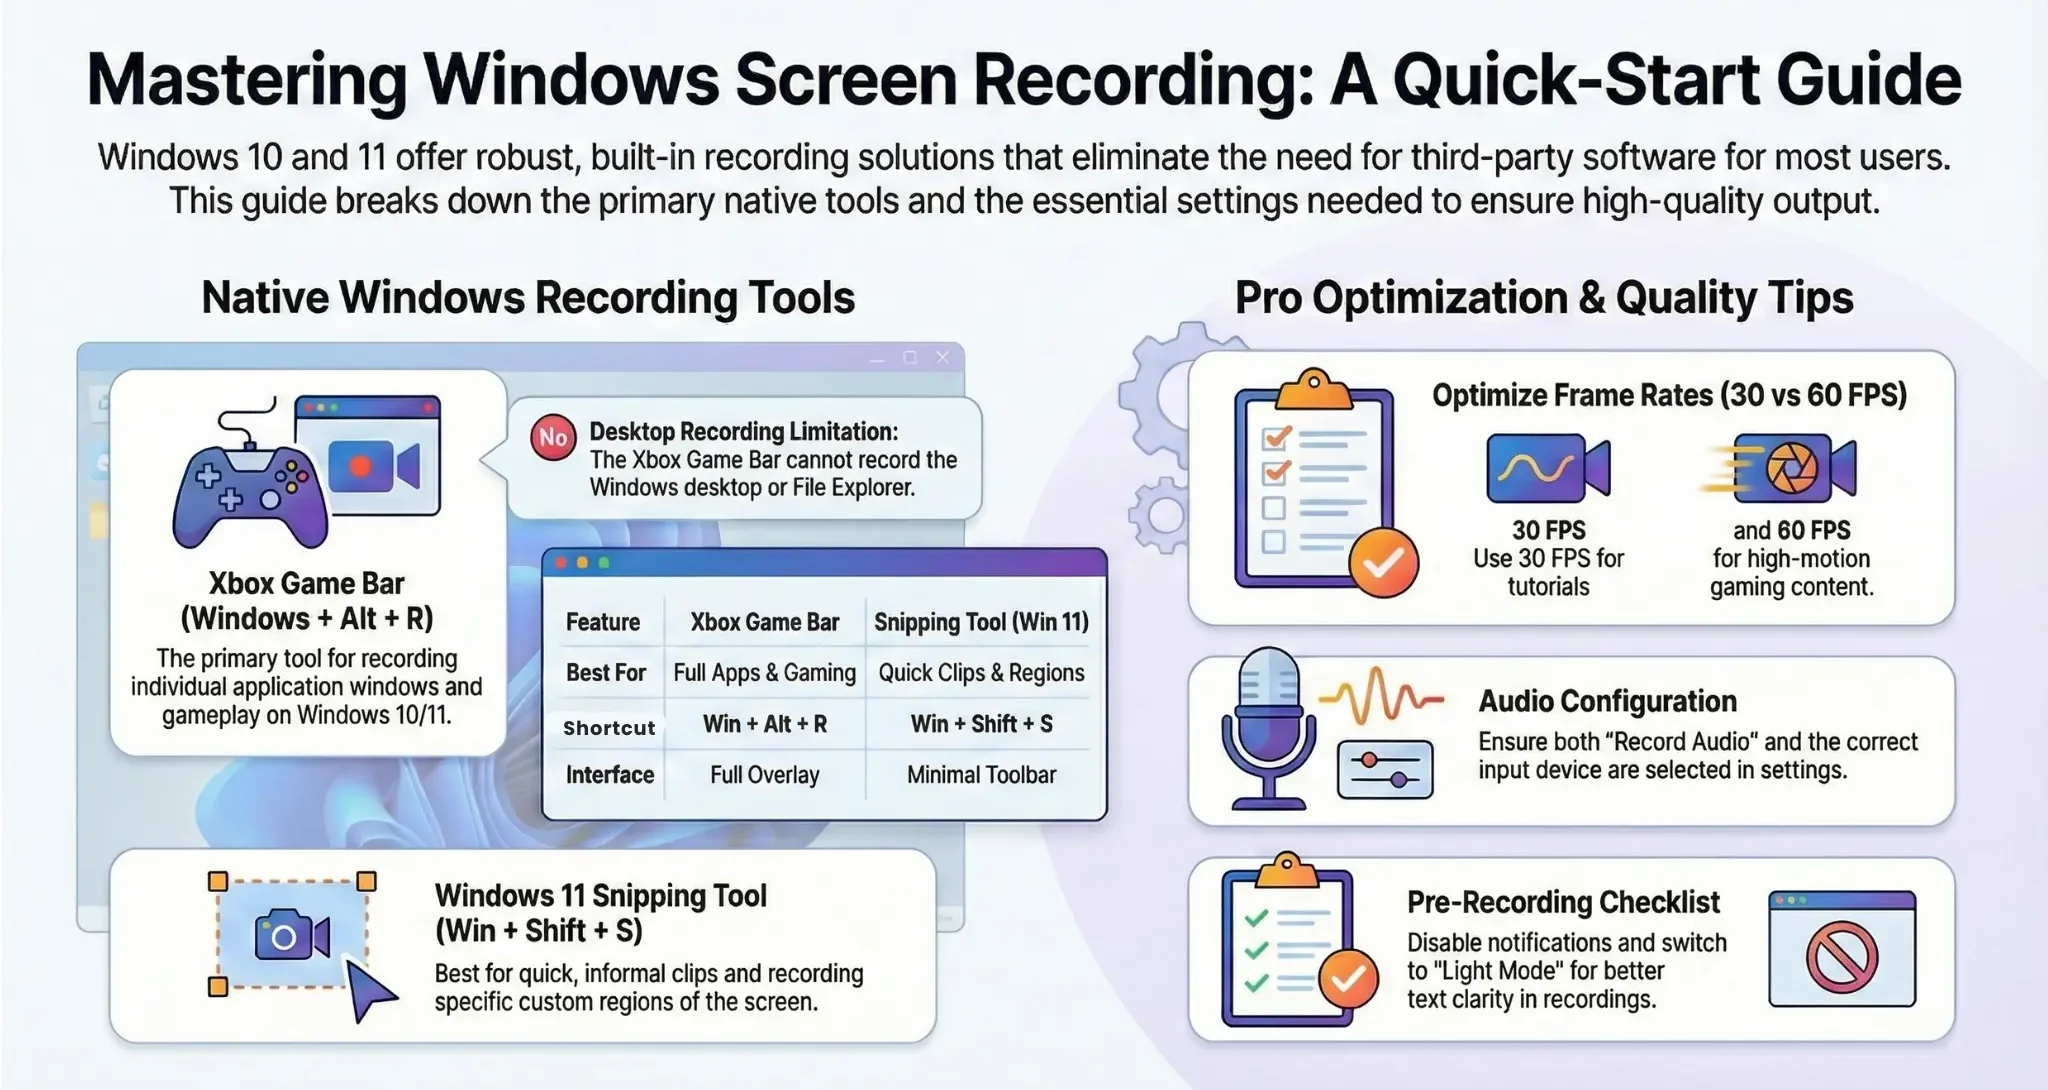
Windows 10 users enjoy nearly identical screen recording capabilities to their Windows 11 counterparts, with the Xbox Game Bar serving as the primary built-in solution. The interface and functionality remain consistent across both operating systems, meaning the recording process, keyboard shortcuts, and quality settings work exactly the same way. One key difference: Windows 10 users won’t find the updated Snipping Tool with video recording capabilities, as this feature arrived exclusively with Windows 11.
What makes this tool noteworthy:
Microsoft designed the Game Bar primarily for capturing gameplay, but its functionality extends to recording presentations, software tutorials, video calls, and general desktop activities. The tool offers decent quality without requiring downloads or subscriptions.
Key limitations to know upfront:
The Game Bar cannot record the Windows desktop itself or File Explorer, it only captures individual application windows. Additionally, it works best for single-application recording rather than multi-window workflows.
Why Windows 10 Users Can Rely on Game Bar
However, the Game Bar more than compensates for this limitation, offering robust recording options that handle everything from casual screen captures to extended gaming sessions. Windows 10 continues receiving updates and support through October 2025, ensuring the Game Bar remains fully functional and reliable for users who haven’t yet upgraded to the newer operating system.
How to Record Your Screen on PC Using Xbox Game Bar
Getting started takes just moments once you understand the keyboard shortcuts and settings.
i. Activation process:
Press Windows + G simultaneously to launch the Game Bar overlay. If this is your first time using the feature, Windows may prompt you to confirm that “yes, this is a game” even when recording non-gaming applications. This confirmation enables the recording functionality.
ii. Starting your first recording:
Look for the Capture widget within the Game Bar interface. Click the circular record button, or use the keyboard shortcut Windows + Alt + R to begin recording immediately. A small recording timer appears at the top-right of your screen, showing elapsed time and confirming that capture is active.
iii. Controlling your recording:
The same Windows + Alt + R shortcut stops recording. Windows automatically saves completed recordings to your Videos folder under “Captures,” typically located at C:\Users[YourName]\Videos\Captures.
iv. Audio configuration:
By default, the Game Bar captures system audio and microphone input simultaneously. Access the audio settings through the Game Bar menu to adjust volume levels or disable microphone recording when you only need system sounds.
Optimizing Recording Quality and Performance
Quality settings directly impact both file size and visual clarity. Navigate to Settings > Gaming > Captures to access these crucial options.
i. Resolution and frame rate choices:
Standard recording captures at 30 frames per second (fps), which suits most tutorial and presentation needs. Content creators focused on gaming or fast-motion content should enable 60fps recording for smoother playback. Higher frame rates produce larger file sizes but deliver noticeably better quality during action sequences.
ii. Video quality slider:
Windows offers a quality adjustment from Standard to High. High quality produces crisper recordings with better color accuracy, though files may reach several hundred megabytes for longer sessions. Most users find that Standard quality provides acceptable results for sharing via email or cloud storage.
iii. Audio quality considerations:
The built-in recorder samples audio at 192 kbps by default—sufficient for clear voice narration and system sounds. This bitrate balances clarity with file size efficiency.
How to Record Screen on Windows 11: Native Snipping Tool Updates
Windows 11 introduced expanded recording capabilities through an updated Snipping Tool that many users overlook. This represents Microsoft’s effort to consolidate screen capture functionality into a single, accessible utility.
i. New recording features:
The redesigned Snipping Tool now includes a screen recording mode alongside traditional screenshot options. Access it by searching “Snipping Tool” in the Start menu or pressing Windows + Shift + S and selecting the video record option from the toolbar.
ii. When to use Snipping Tool instead of Game Bar:
This tool excels for quick, informal recordings without the need for Game Bar’s overlay interface. It works well for capturing short clips to share in messages or emails, though it lacks the advanced settings found in Game Bar.
iii. Recording workflow:
Click the video camera icon in the Snipping Tool, select your recording area by dragging a rectangle around the desired screen region, then click Start to begin recording. Click Stop when finished, and the tool prompts you to save the file immediately.
Screen Recording Software for Windows: When to Upgrade
While built-in tools handle basic needs effectively, certain scenarios demand more sophisticated screen recording software for Windows.
i. Professional requirements that exceed native capabilities:
Content creators producing YouTube tutorials often need features like webcam overlay, multiple audio tracks, real-time annotation, and advanced editing capabilities. Corporate training departments require consistent branding elements, cursor highlighting, and scheduled recording options. Technical documentation teams benefit from automatic zoom-to-cursor effects and keystroke display.
ii. Popular third-party alternatives worth considering:
Professional users frequently turn to dedicated software offering features absent from Windows’ native tools. These applications provide greater control over output formats, compression settings, and post-recording editing workflows.
iii. Cost-benefit analysis:
Free built-in options suit occasional users and those recording simple demonstrations. Investing in dedicated software makes sense when recording frequency increases or quality requirements become more demanding. Many professionals find that specialized tools pay for themselves through time savings during the editing process.
Step-by-Step: How to Record on PC for Different Scenarios
Recording techniques vary significantly depending on your specific use case. Understanding these variations helps optimize both process efficiency and final output quality.
Screen Recording in Laptop vs Desktop Environments
While the process is similar, screen recording in laptop setups may require attention to battery usage and thermal limits.
Laptops benefit from:
- Lower resolution settings
- External microphones
- Plugged-in power during long sessions
Desktops generally handle higher resolutions with fewer constraints.
i. Recording Presentations and Tutorials
Educational content demands clarity above all else. Before starting, close unnecessary applications to minimize distractions in your recording. Ensure your screen resolution matches your target platform—1080p works well for YouTube and most online courses.
ii. Preparation checklist:
Disable desktop notifications through Settings > System > Notifications to prevent interruptions during recording. Clear your desktop of sensitive or irrelevant files. Test your microphone levels to ensure narration will be audible without distortion.
iii. Recording workflow:
Launch the Game Bar, start recording, then proceed through your tutorial content at a measured pace. Speak clearly and pause briefly between major points—this makes editing significantly easier if you need to trim sections later.
Capturing Gaming Sessions
Gaming recordings prioritize smooth motion and audio synchronization. Enable 60fps recording in Game Bar settings before launching your game. This frame rate ensures that fast-paced action appears fluid rather than choppy during playback.
i. Performance considerations:
Screen recording consumes system resources, potentially impacting game performance on older hardware. If you experience frame rate drops during recording, reduce in-game graphics settings or lower the recording resolution to 720p. Modern systems with dedicated graphics cards typically handle simultaneous gaming and recording without issues.
ii. Audio mixing for gameplay:
Balance game audio and microphone commentary by adjusting levels in the Game Bar audio settings. Most viewers prefer commentary to be slightly louder than game sounds, ensuring your voice remains clearly audible during intense action sequences.
Recording Video Calls and Webinars
Capturing online meetings requires attention to both technical and ethical considerations. Always inform participants before recording—most video conferencing platforms include built-in recording features that notify all attendees automatically.
i. Using Windows recording for calls:
If you need to record a call outside the conferencing platform’s native recording feature, the Game Bar captures both video and audio from your conferencing application window. Ensure system audio recording is enabled to capture both sides of the conversation.
ii. Privacy and consent:
Recording conversations without consent violates laws in many jurisdictions and company policies. Establish clear recording practices that respect participant privacy while serving your documentation needs.
Advanced Tips: Maximizing Recording Quality
Several lesser-known techniques significantly improve recording outcomes without requiring expensive software upgrades.
i. Lighting and display optimization:
Increase your monitor brightness slightly before recording to ensure text appears crisp and colors render accurately. If recording application interfaces, disable dark mode temporarily—light backgrounds with dark text typically display better in compressed video formats.
ii. Cursor behavior:
Windows offers cursor highlighting in Ease of Access settings, making mouse movements more visible during tutorials. This feature helps viewers follow along with complex software demonstrations.
iii. File management strategies:
Screen recordings generate large files quickly. A 10-minute recording in high quality can exceed 1GB. Regularly transfer completed recordings to external storage or cloud backup to prevent filling your primary drive. Consider using file compression tools or video editing software to reduce file sizes before sharing.
iv. Keyboard shortcut mastery:
Memorizing recording shortcuts eliminates the need to fumble with menus during time-sensitive captures. Practice starting and stopping recordings with Windows + Alt + R until the action becomes second nature.
Troubleshooting Common Recording Problems
Even with proper preparation, users occasionally encounter technical difficulties. Understanding common issues and their solutions saves considerable frustration.
i. Recording won’t start:
If the Game Bar refuses to begin recording, verify that the application you’re trying to record is in focus and running in windowed or borderless windowed mode rather than true fullscreen. Some applications block recording for copyright protection—streaming video services commonly employ this restriction.
ii. No audio in recordings:
Missing audio typically stems from incorrect settings in the Game Bar audio menu. Open Settings > Gaming > Captures and verify that both “Record audio” and the correct audio input device are selected. Test your microphone outside the Game Bar to confirm it’s functioning properly.
iii. Choppy or laggy recordings:
Performance issues during recording indicate insufficient system resources. Close background applications, especially browsers with multiple tabs, to free memory. Reduce recording quality settings or resolution if problems persist. Older systems may require hardware upgrades to handle simultaneous high-quality recording and application use.
iv. Files won’t save or disappear:
If recordings fail to save, check available storage space on your primary drive. The Game Bar requires adequate free space to write video files during recording. Additionally, verify that your antivirus software isn’t quarantining video files—some security programs mistakenly flag screen recordings as suspicious.
Comparing Recording Methods: Which Approach Fits Your Needs?
Different recording tools serve distinct purposes. Matching the right tool to your specific requirements prevents frustration and delivers better results.
i. Game Bar advantages:
This built-in option requires zero setup, handles basic recording needs effectively, and integrates seamlessly with Windows. It works well for occasional users and those recording single-application demonstrations without complex editing requirements.
ii. Snipping Tool benefits:
Quick access and minimal interface make this ideal for informal recordings shared directly in messages or emails. The simplified approach suits users who prioritize speed over advanced features.
iii. Third-party software scenarios:
Professional content creators, corporate trainers, and frequent recorders benefit from dedicated applications offering advanced editing, multiple audio tracks, and customizable overlays. These tools justify their cost through enhanced capabilities and time savings during post-production.
iv. Decision framework:
Ask yourself: How frequently will I record? Do I need editing capabilities? Must recordings include webcam overlays or annotations? Will viewers expect professional-quality output? Honest answers to these questions reveal whether native tools suffice or whether specialized software represents a worthwhile investment.
Mostly People Asked Questions
How do I record my screen on a Windows laptop without additional software?
Windows 10 and 11 include the Xbox Game Bar, accessible by pressing Windows + G. Click the record button or use Windows + Alt + R to start recording immediately. This built-in tool handles most basic screen recording needs without requiring downloads or installations.
Can I record specific windows or only the full screen?
The Game Bar records individual application windows rather than your entire desktop. This means you cannot capture the Windows desktop itself or File Explorer, but you can record any application window including browsers, productivity software, and games. The Snipping Tool allows selecting custom screen regions for recording.
What’s the maximum recording length in Windows?
The Game Bar allows recordings up to 4 hours by default, though this limit can be adjusted in Settings > Gaming > Captures. Practical recording length depends more on available storage space than software limitations—a one-hour high-quality recording can consume several gigabytes of storage.
Does screen recording on Windows capture audio from both system and microphone?
Yes, the Game Bar records both system audio (sounds from your computer) and microphone input simultaneously by default. You can disable either source through the audio settings in the Game Bar menu if you only need one audio type.
Why is my recording quality poor or pixelated?
Low recording quality typically results from settings configured for smaller file sizes. Navigate to Settings > Gaming > Captures and move the video quality slider toward High. Additionally, ensure your system meets the performance requirements for high-quality recording—older hardware may struggle with maximum quality settings.
How do I find my saved screen recordings?
Windows saves Game Bar recordings automatically to C:\Users[YourName]\Videos\Captures. You can change this location in Settings > Gaming > Captures by selecting a different save folder. Snipping Tool recordings prompt you to choose a save location immediately after stopping the recording.
Making Screen Recording Work for You
Understanding how to record on PC effectively opens countless possibilities for communication, documentation, and creative expression. Whether you rely on Windows’ built-in xbox game bar screen recording capabilities or invest in specialized screen recording software for windows, the key lies in matching tools to your specific needs.
Remote workers can document processes that would take hours to explain verbally. Educators create reusable content that students review at their own pace. Content creators build audiences through high-quality tutorials and demonstrations. Technical professionals reduce support tickets by producing clear visual guides.
The screen recording in laptop workflows continues evolving as Microsoft refines Windows recording capabilities and third-party developers introduce innovative features. Mastering the fundamentals covered in this guide positions you to take advantage of these improvements while avoiding common pitfalls that compromise recording quality.
Start with the built-in tools, experiment with different settings, and upgrade to specialized software when your requirements outgrow native capabilities. Now that you understand how to record your screen on pc using multiple approaches, you’re equipped to choose the method that best serves your goals and creates the visual content your audience needs.